Veertuの仮想マシンにインストールしたWindowsで「ファイル共有」や「スマートマウス」、「クリップボード共有」などの機能を利用する方法です。詳細は以下から。
昨日Hypervisorを利用した仮想マシン構築アプリ「Veertu」のベンチマークを行い、コンクルージョンに「Veertuはディレクトリ共有などの機能がない」と書いたところ、
Veertuの開発元であるVeertu Labsさんから「Windowsゲストでは”Guest Add-Ons”を用意しており、ファイル共有、マウスの自動接続、クリップボード共有、フルスクリーン切替が自動で使えるので利用してみてください」とチュートリアルリンクを送って頂いたので早速利用してみました。
使い方
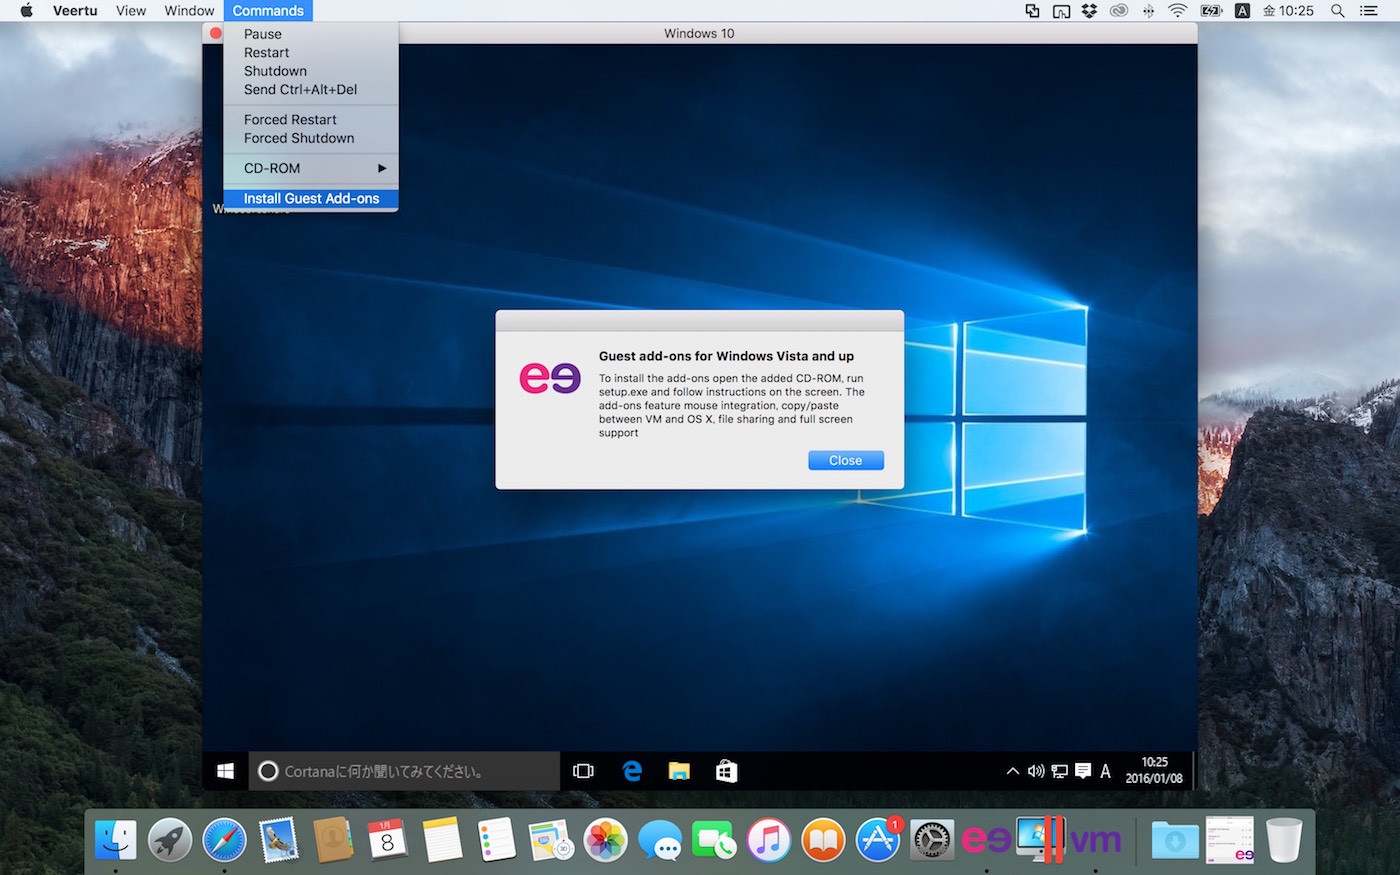
使い方は仮想マシンでゲストOSにWindowsをインストールし、メニューバーの[Commands] > [Install Guest Add-Ons]を選択、CD-RAMにGuest Add-Onsのイメージが接続されるのでインストールしWindowsを再起動すれば以下の様にファイル共有などの機能が利用できます。
To install Guest Add-Ons:
1. From the VM menu bar select Commands / Install Guest Add-Ons
2. Wait for a CD-ROM to appear in Windows Explorer
3. Windows will either auto-run the installer or you can launch it manually from the CD
4. Follow instructions on the screen and reboot Windows
また、このAdd-OnsはVeertuの設定の[Edit VM] > [Advanced]から共有フォルダの変更やファイルおよびクリップボード共有のON/OFF、VMのRead-Onlyモード、CmdとCtrlキーのリマップなどが行えます。

Veertu 無料(4,800円)
[appbox appstore id1024069033]
関連リンク

コメント
なかなか便利そうだな〜。ただ個人的にはWIndowsを起動する理由ってゲームをする時以外にないんだよな。
parallelsとの差ってどこなんだろう
OS XのHypervisor.frameworkとかVMNet.frameworkを使うのがVeertu。
その辺が自前なのがParallels(だからApp Store経由で販売できない)。