macOS VMのCPUやメモリ、ストレージ、ネットワーク、ディスプレイの設定が可能になったApple Silicon Mac用仮想化ソフトウェア「VirtualBuddy v1.2」がリリースされています。詳細は以下から。
![]()
StatusBuddyやAirBuddyなどBuddyシリーズを開発しているBuddy Software LTDのGuilherme Ramboさんは現地時間2022年07月28日、AppleのVirtualizationフレームワークを利用して開発しているApple Silicon Mac用の仮想化ソフトウェアVirtualBuddyの最新バージョンとなる「VirtualBuddy v1.2」をリリースし、仮想マシンの設定に対応したと発表しています。
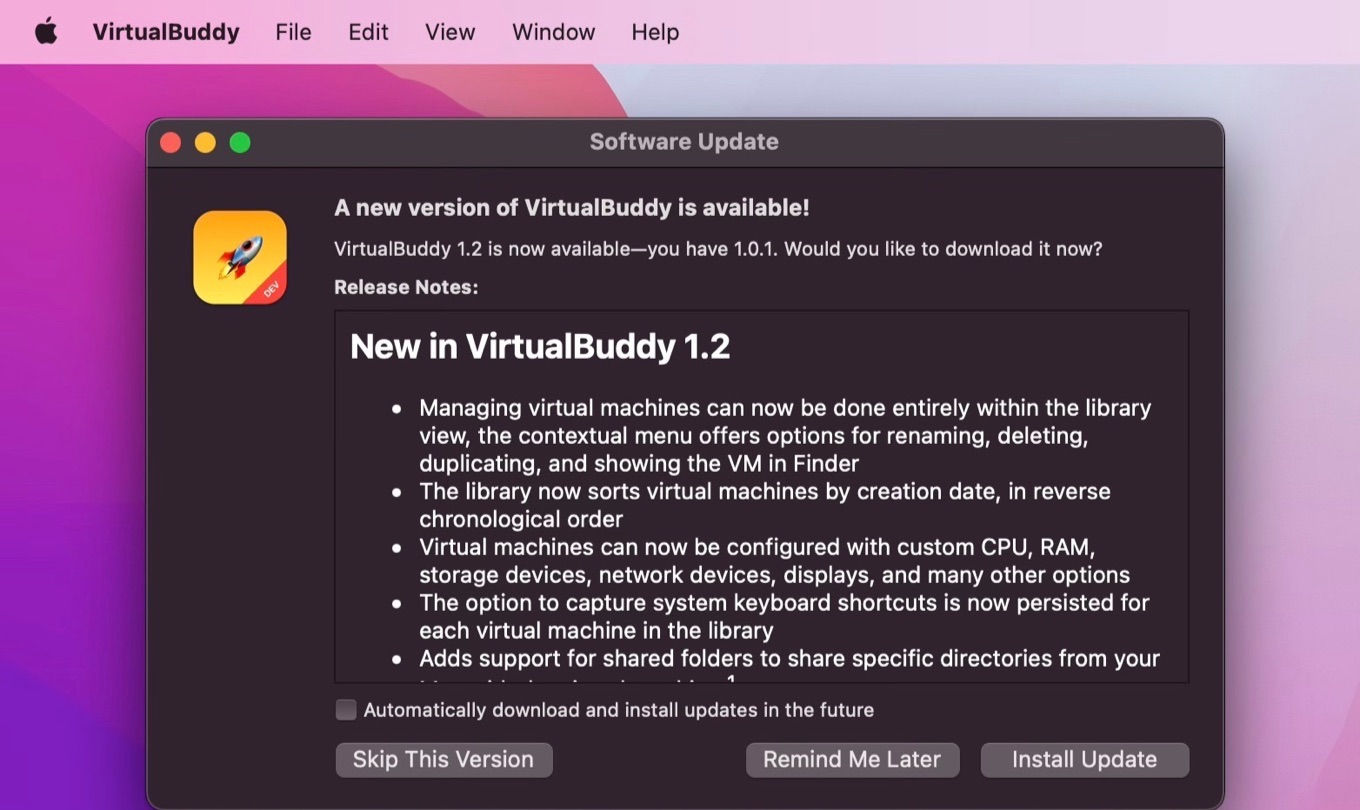
Virtual machines can now be configured with custom CPU, RAM, storage devices, network devices, displays, and many other options
リリースノートより抜粋
VirtualBuddy v1.2
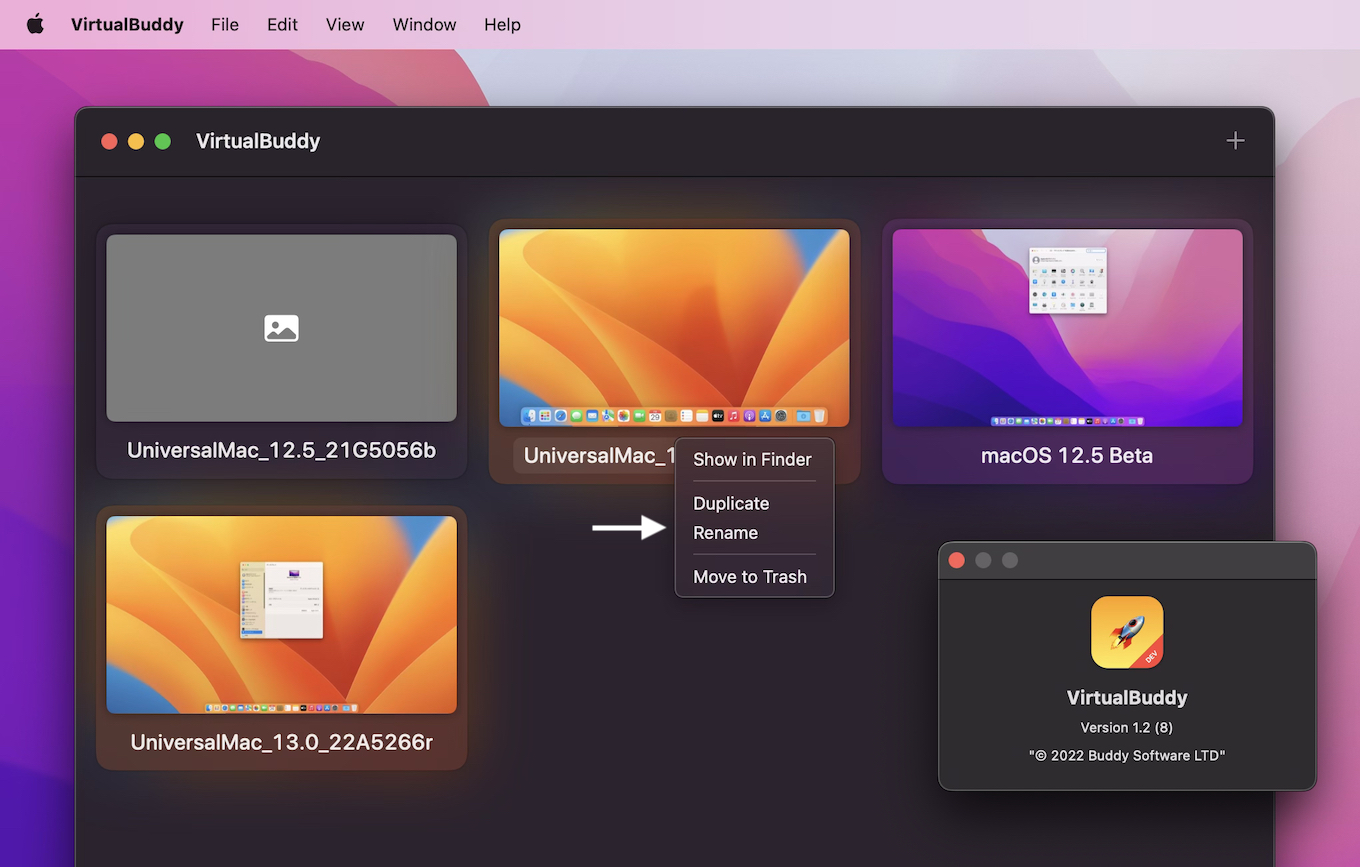
VirtualBuddy v1.2では、新たに仮想マシンライブラリから、仮想マシンの名前の変更や削除、複製、仮想マシンファイルをFinderに表示するが実行可能になり、仮想マシンの作成日による逆ソートもサポートされています。
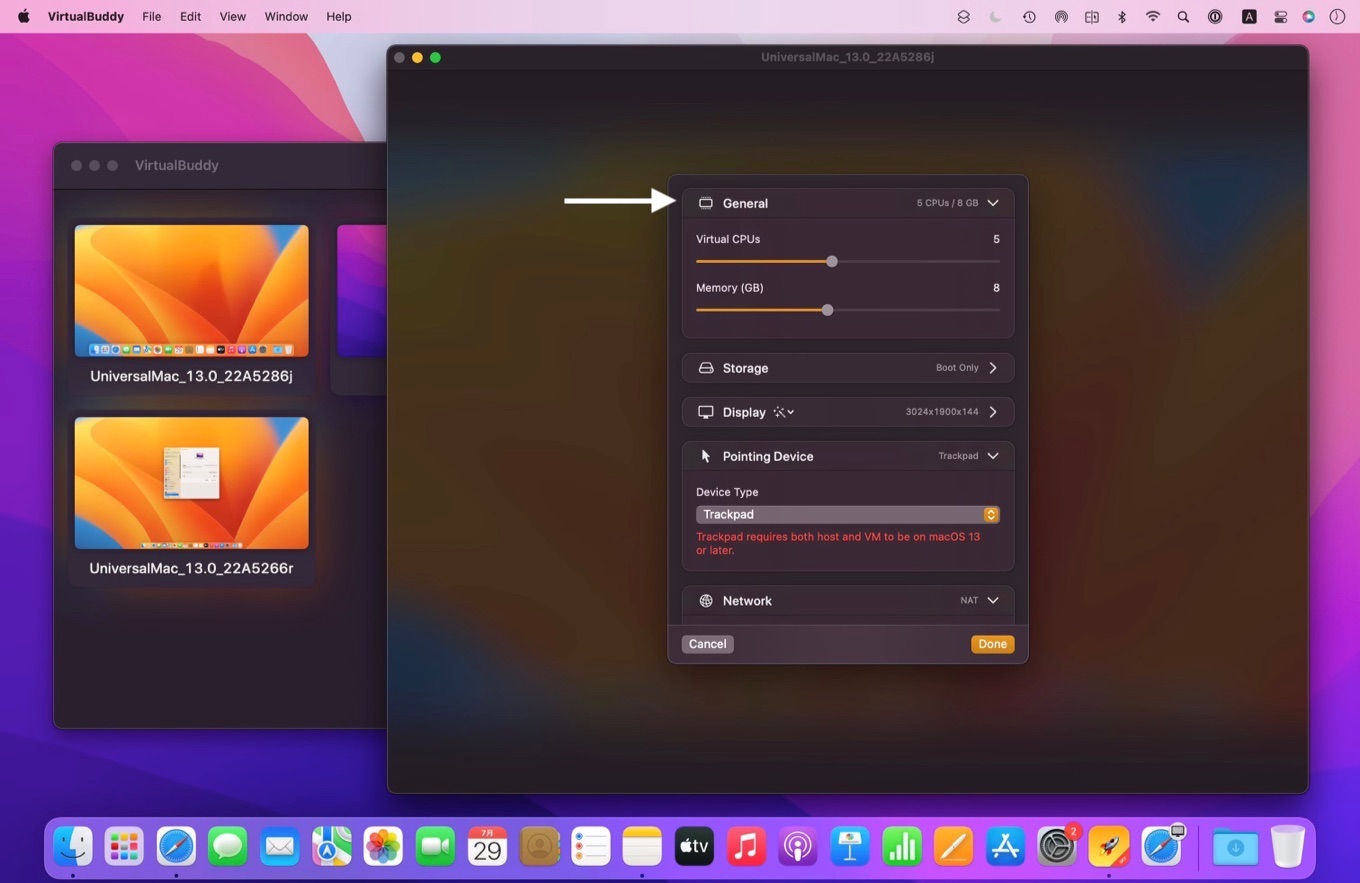
また、VirtualBuddyでは、これまで仮想マシンのストレージサイズの設定しかできませんでしたが、VirtualBuddy v1.2では、仮想マシンのCPU、メモリ、ストレージ、ディスプレイ、ポインティングデバイス(Mouse/Trackpad*)、ネットワーク(NAT/Bridge)、サウンド、共有フォルダの設定が可能になっています。
この他、VirtualBuddy v1.2では、Docker for Macと同様にファイルシステムVirtioFSを利用してホストとゲストOSの間でフォルダ共有できるようになっているので、MontereyやVenturaのテストを仮想マシンで行いたい方は試してみてください。
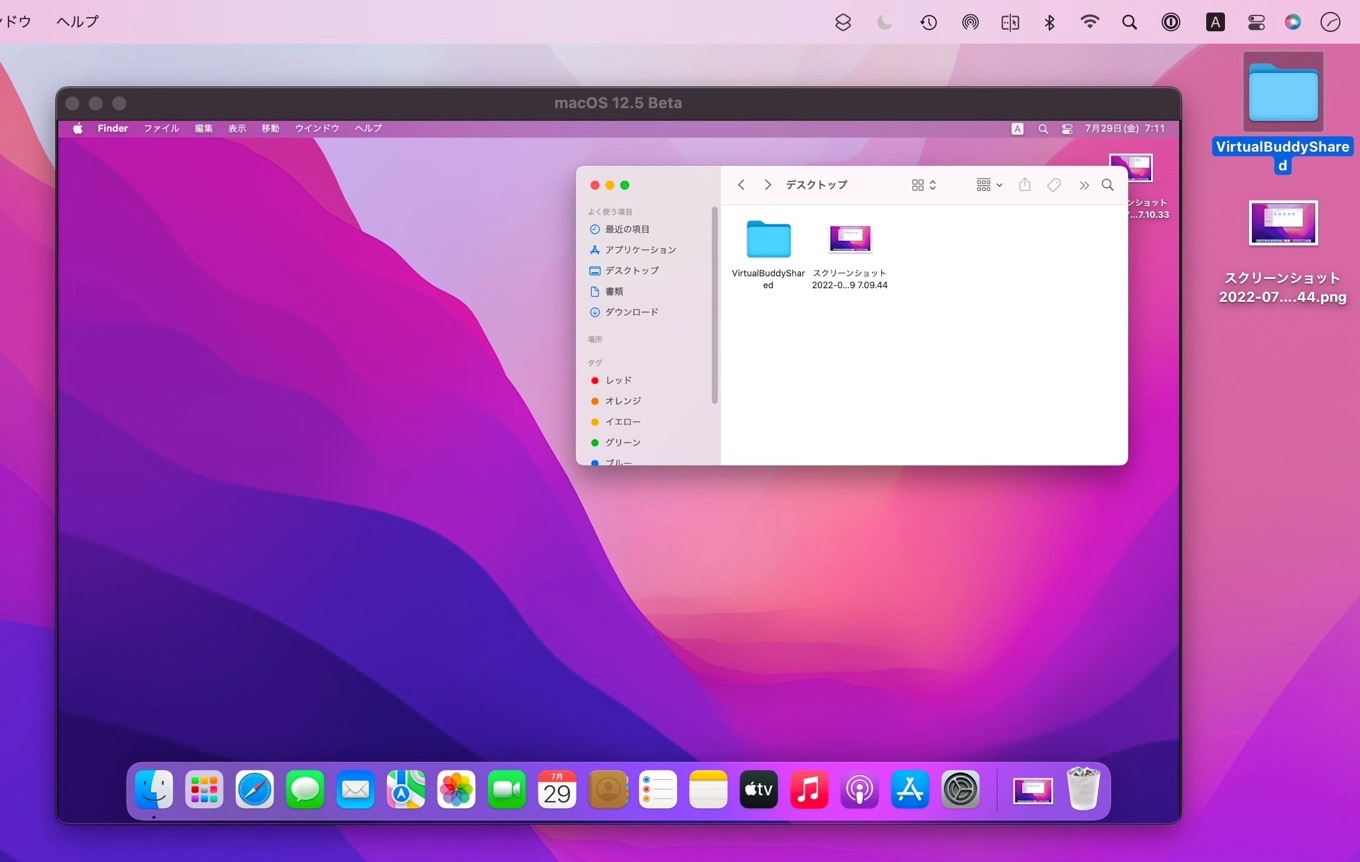
mkdir -p ~/Desktop/VirtualBuddyShared && mount -t virtiofs VirtualBuddyShared ~/Desktop/VirtualBuddyShared
リリースノート
New in VirtualBuddy 1.2
- Managing virtual machines can now be done entirely within the library view, the contextual menu offers options for renaming, deleting, duplicating, and showing the VM in Finder
- The library now sorts virtual machines by creation date, in reverse chronological order
- Virtual machines can now be configured with custom CPU, RAM, storage devices, network devices, displays, and many other options
- The option to capture system keyboard shortcuts is now persisted for each virtual machine in the library
- Adds support for shared folders to share specific directories from your Mac with the virtual machine ¹
- Adds support for bridged networking, allowing a physical network interface from your Mac to be exposed to the virtual machine
- Additional storage can now be added to virtual machines by creating new disk images from within VirtualBuddy
- A new debug console showing logs related to the installation process is now available while installing macOS in a new virtual machine
- The default library directory for new installs is now ~/Library/Application Support/VirtualBuddy (this is where VirtualBuddy stores virtual machines and downloads)
- Clicking a virtual machine that’s already open in the library will now correctly focus the existing window for that virtual machine
Known issues
- If macOS installation is interrupted, the broken virtual machine is still shown in the library and there’s currently no way to finish the installation; workaround: delete the VM and create a new one
- When a library is moved between different hosts, the configuration for a virtual machine might be unsupported in the new host, preventing it from starting; workaround: adjust the virtual machine settings for the new host
- The initial display resolution setting after creating a new virtual machine is not set to “Size to Fit …” in some situations
- When editing storage settings for an existing virtual machine, the Boot disk is incorrectly selectable on the list and selecting it enables the remove button, even though the Boot disk can’t be deleted
- Setting the pointing device to “Trackpad” may cause the cursor to be unusable in the virtual machine
¹ Using shared folders
To make your shared folders available in the virtual machine,run the following command in Terminal (Applications > Utilities > Terminal):
mkdir -p ~/Desktop/VirtualBuddyShared && mount -t virtiofs VirtualBuddyShared ~/Desktop/VirtualBuddyShared
A folder named “VirtualBuddyShared” will show up on the Desktop.
- VirtualBuddy – GitHub
コメント
初期割り当てディスク容量が 128G かつ変更可能なので、Parallels ではできなかった仮装 macOS に Xcode の AppStopre からのインストールができるようになった。
けど USB 接続はまだサポートされていないので iOS デバイスは直接にはつながらない。
macOS の開発には使えるけど iOS 開発にはまだ足りない。