macOS 10.13.4 High Sierraインストーラーでアップデートされた「startosinstall」コマンドを利用して、macOSをクリーンインストールする方法です。詳細は以下から。
![]()
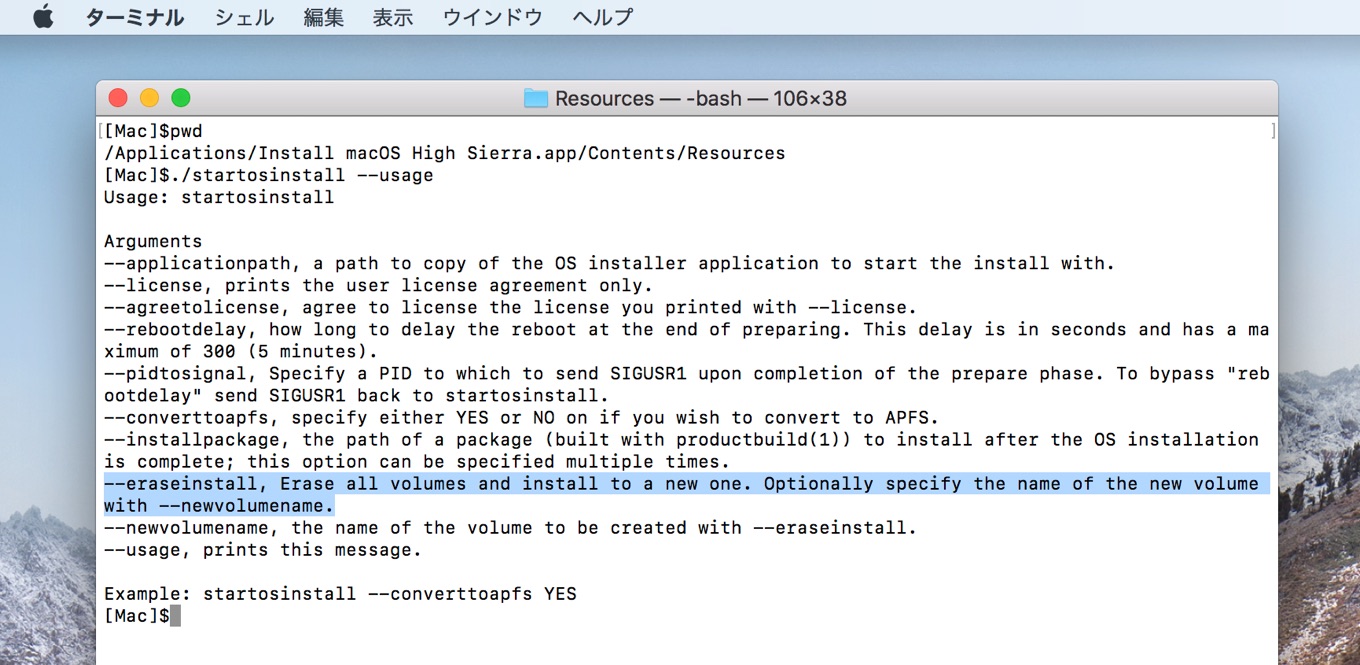
現地時間2018年03月29日Appleがリリースした「macOS 10.13.4 High Sierra」では複数の不具合が修正されている他、エンタープライズ向けの新機能として”startosinstall”コマンドに「ボリュームを全て削除し、macOSを新しくインストールする”–eraseinstall”オプション」が追加されていたので早速利用してみました。
startosinstall --usage
Usage: startosinstall

Arguments
--applicationpath, a path to copy of the OS installer application to start the install with.
--license, prints the user license agreement only.
--agreetolicense, agree to license the license you printed with --license.
--rebootdelay, how long to delay the reboot at the end of preparing. This delay is in seconds and has a maximum of 300 (5 minutes).
--pidtosignal, Specify a PID to which to send SIGUSR1 upon completion of the prepare phase. To bypass "rebootdelay" send SIGUSR1 back to startosinstall.
--converttoapfs, specify either YES or NO on if you wish to convert to APFS.
--installpackage, the path of a package (built with productbuild(1)) to install after the OS installation is complete; this option can be specified multiple times.
--eraseinstall, Erase all volumes and install to a new one. Optionally specify the name of the new volume with --newvolumename.
--newvolumename, the name of the volume to be created with --eraseinstall.
--usage, prints this message.

Example: startosinstall --converttoapfs YES
eraseinstallの利点
これまでmacOSをクリーンインストールするにはmacOSのインストールアプリをダウンロードし、USBメモリなどに起動可能なメディアを作成、その後メディアからmacOSを起動し、ディスクユーティリティでボリュームをフォーマット…といった操作が必要でしたが、
新たに導入された”startosinstall –eraseinstall”コマンド&オプションは途中のステップを自動で行ってくれるため、以下の2~5のステップを省略することが出来ます。

startosinstall –eraseinstallインストールでは見ることがありません。
- macOSのインストールアプリをMac App Storeからダウンロードする。
- 起動可能なメディア(USBインストーラー)を作成。
- USBインストーラーから「macOSユーティリティ」を起動。
- ディスクユーティリティアプリでHDDやSSDなどのストレージをフォーマット。
- macOSのインストールを開始。
- セットアップユーティリティでキーボードやネットワーク、アカウントを設定。
利用方法
macOS 10.13.4 High Sierraのインストールアプリで追加された”–eraseinstall”オプションを利用したmacOSのクリーンインストール方法は以下の通りで、利用にはAPFSフォーマットのMacが必要のようで、以下の例ではmacOS 10.13.3のMacBook Pro 2016をクリーンインストールしています。
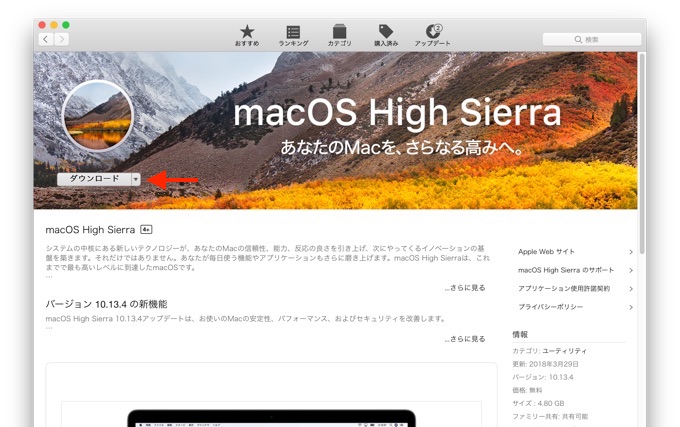
1.macOS 10.13.4 High SierraのインストールアプリをMac App Storeからダウンロード。
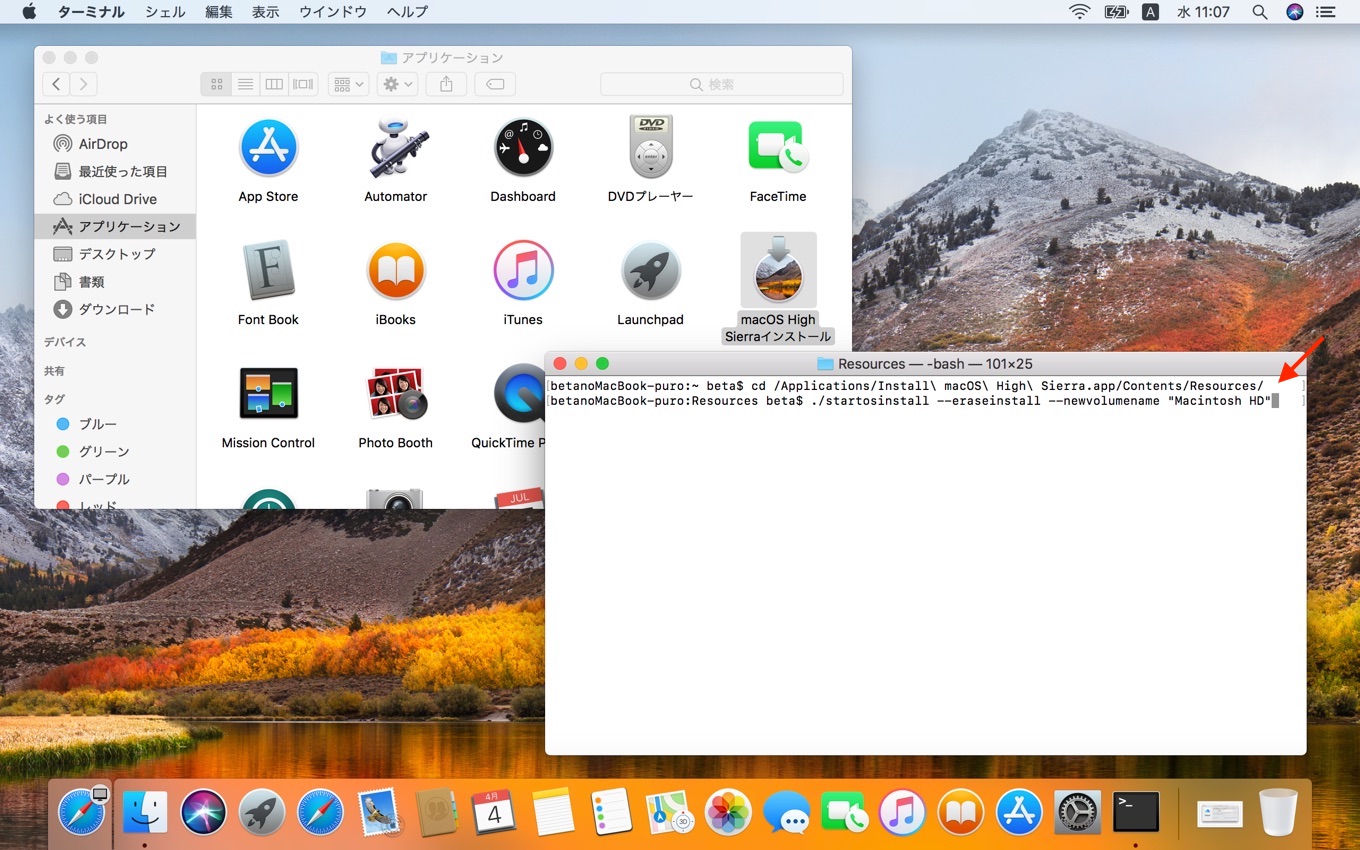
2.macOS 10.13.4のインストールアプリ内にある”Resources”フォルダに移動し”startosinstall –eraseinstall”を実行。この時、追加オプション”–newvolumename “hogehoge””を利用するとボリューム名を”hogehoge”でフォーマットしてくれます。
クリックで拡大
cd /Applications/Install\ macOS\ High\ Sierra.app/Contents/Resources
./startosinstall --eraseinstall --newvolumename "Macintosh HD"
3.「このインストールでは全てのデータが消去されます」という警告が出るので、キャンセルする場合は”CTRL-C”、次に進む場合は”A”キー入力後に”Return”を押します。
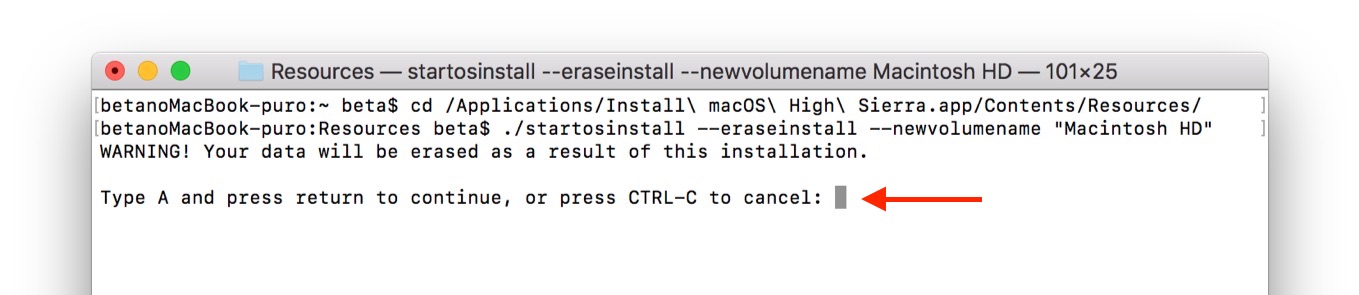
WARNING! Your data will be erased as a result of this installation.

Type A and press return to continue, or press CTRL-C to calsel:
4.macOSのライセンスが表示されるので、3.と同様に”A”キー入力後に”Return”を押し、次に表示される管理者パスワードを入力します。
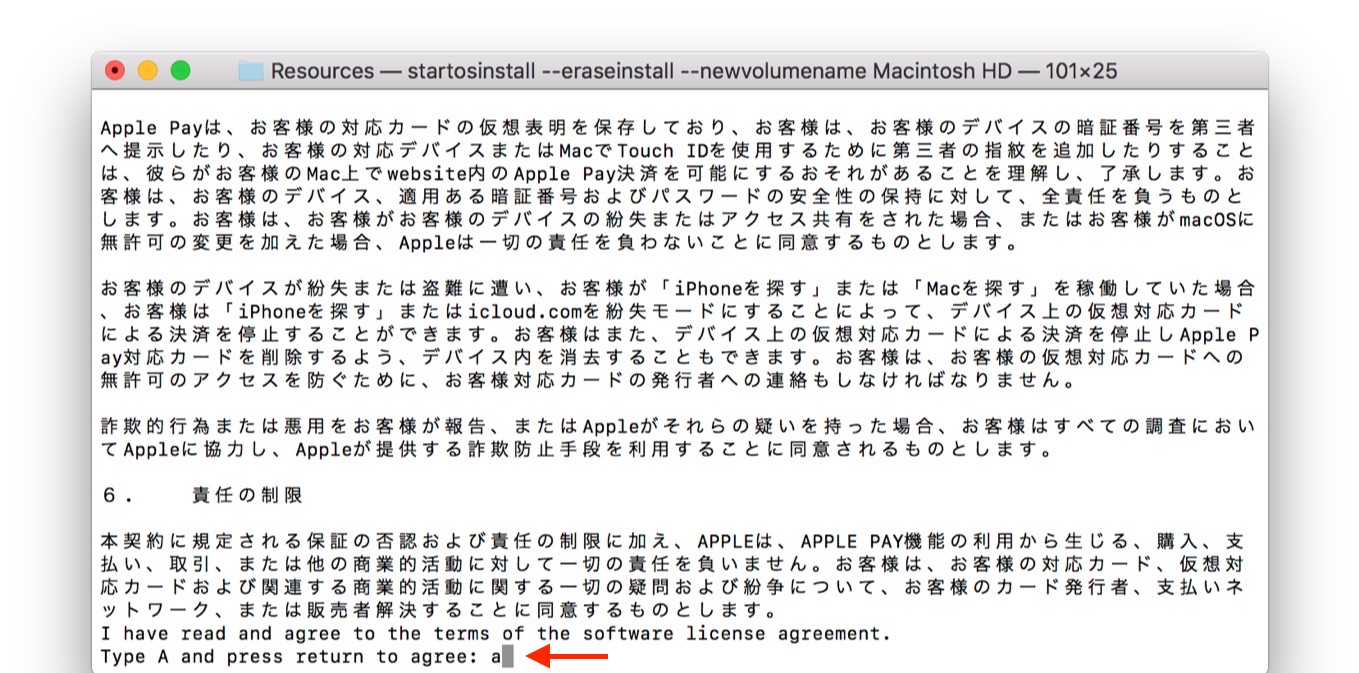
I have read and agree to the terms of software license agreement.
Type A and press return to continue, or press CTRL-C to calsel:
5.後はmacOSのインストーラーがボリュームをフォーマットし、macOSをインストールしてくれるので、ユーザーはmacOSのセットアップ画面が出るまで待っていればいいだけです。
”startosinstall –eraseinstall”コマンドでのクリーンインストールはBootCampアシスタント v6.x以降と同じくUSBメモリが必要なく、SSHやリモートデスクトップなどの環境が設定されていればリモートからも実行できるので、定期的にMacを初期化している人は試してみて下さい。
コメント
楽な時代になったな。