
AppleのAVFを利用しターミナル内にAIエージェントが操作できるmacOS仮想マシンを作成するアプリ「Terminal-Mac」がリリースされています。詳細は以下から。
AIエージェントにタスクをまかせる際、セキュリティ的にホストマシンのフルアクセス権限を与えるのは避けたいため、VMPalやGhostVMなどAIエージェント用の仮想マシンを作成するためのアプリが増えてきていますが、新たに、ターミナル内にAIエージェント用のmacOS仮想マシンを作成できるオープンソースのツール「Terminal-Mac」がリリースされています。
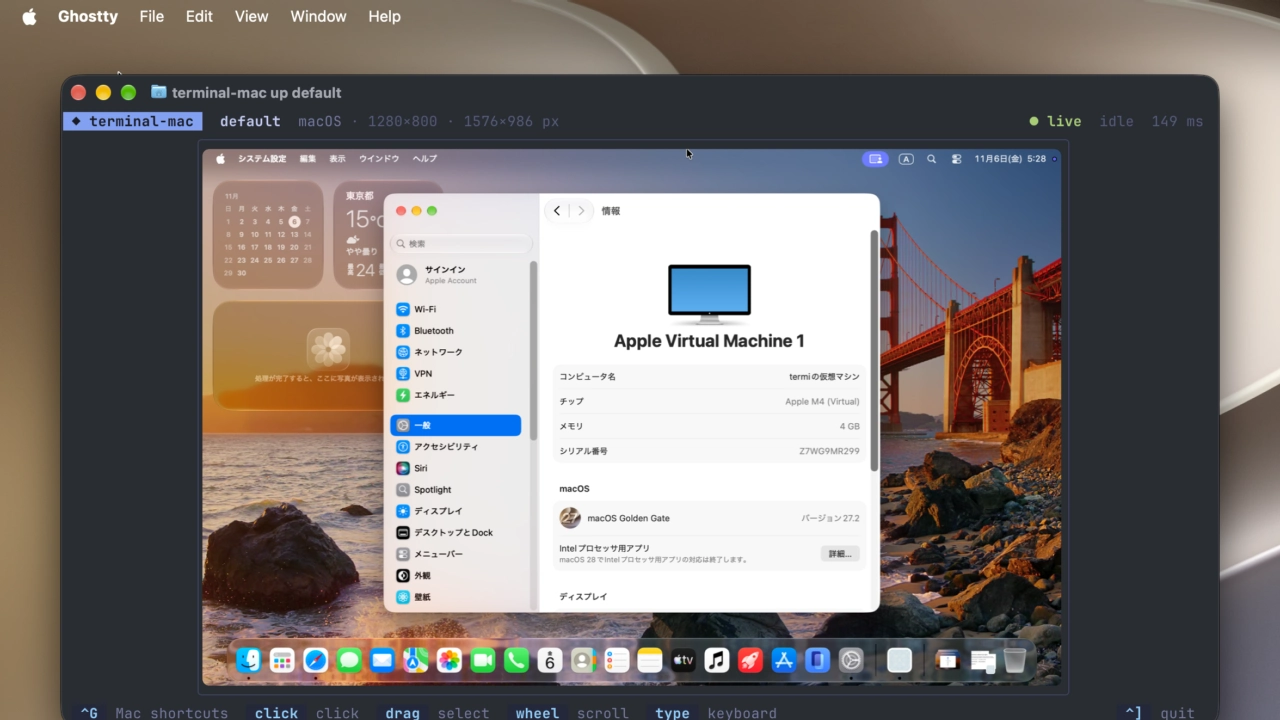
A separate macOS desktop for computer-use agents, viewed and controlled from a terminal.
terminal-mac is an early release candidate for Apple silicon. Apple Virtualization runs a real macOS guest.govijr/terminal-mac: Entire MacOS running in your terminal. – GitHub
Terminal-Macを公開したのはAmazonで機械学習エンジニアをされているgovi(@govijr)さんで、他のアプリと同じくAppleのVirtualizationフレームワーク(AVF)を利用して開発されていますが、AIエージェントから仮想マシンを操作できるようCLIコマンドとMCP Server機能を実装しています。
Introducing terminal-mac.
Entire MacOS that runs inside your existing terminal.
– Give your agent its own Mac, and keep yours
– Watch it work live, next to your terminal
– Computer use built in: MCP, CLI and skill
– Free & open source https://t.co/8vXBG4oXaZ— govi (@kirtandopamine) November 3, 2026
Terminal-Macの使い方
Terminal-Macのシステム要件はmacOS 14 Sonoma以降にApple Silicon MacでAVFの関係からIntel Macには非対応となっており、使い方は、GitHubリポジトリに掲載されているワンライナーでmacOS仮想マシンをインストールし、
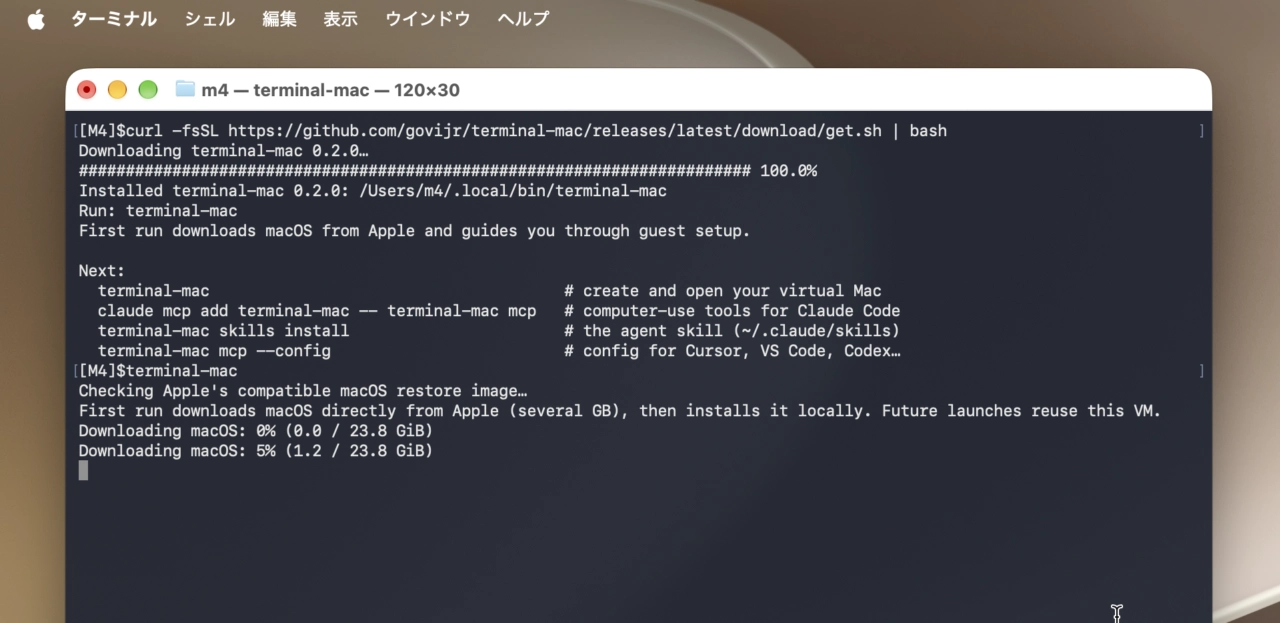
Terminal-Macのインストール
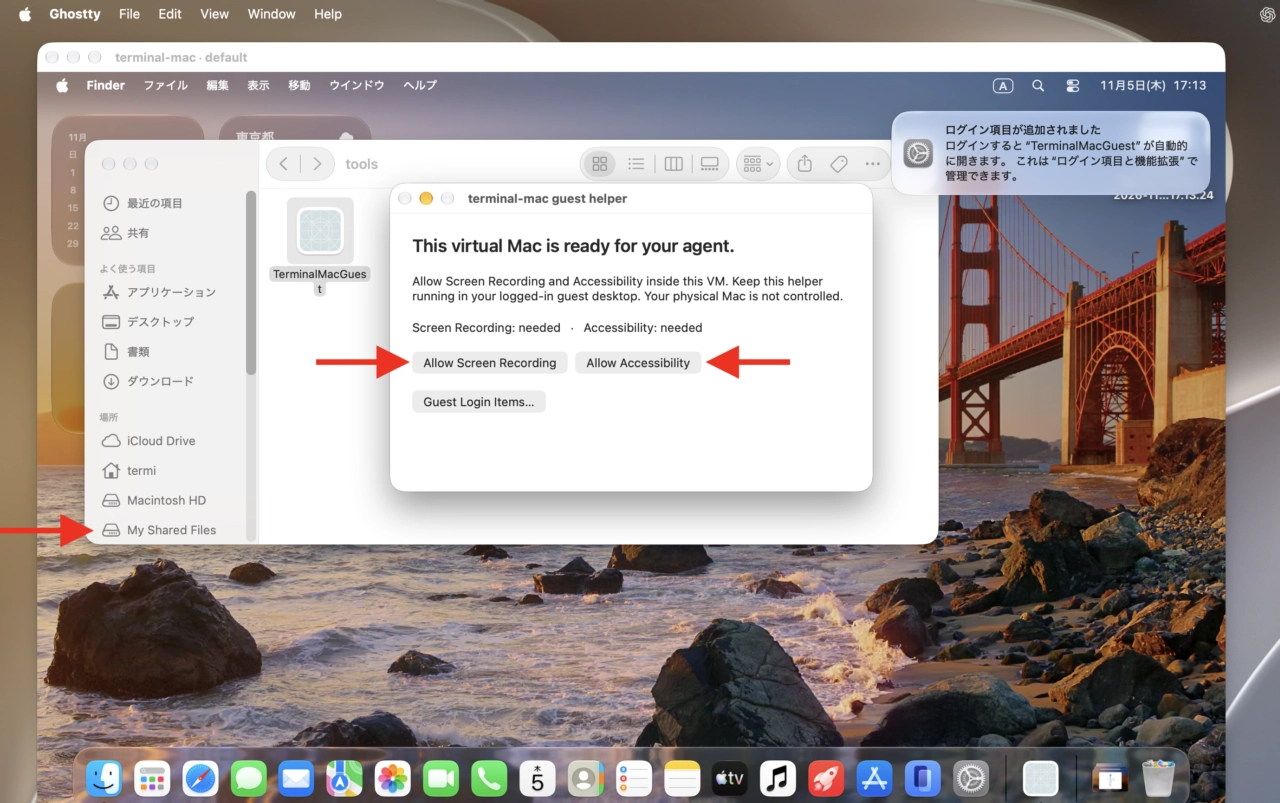
macOS仮想マシンの初期セットアップを終わらせたら、”/Volumes/My Shared Files/tools”ディレクトリ内にあるヘルパーアプリ”TerminalMacGuest.app”を起動、画面収録とアクセシビリティ権限を与え、ログイン項目へヘルパーアプリを登録します。
Terminal-Macの初回セットアップが終わったら、ターミナル内へのインライン画面表示が可能*なGhosttyやKitty、iTerm2などのターミナルアプリで”terminal-mac up default”を実行すればターミナルアプリ内にmacOS仮想マシンの画面が表示されます。
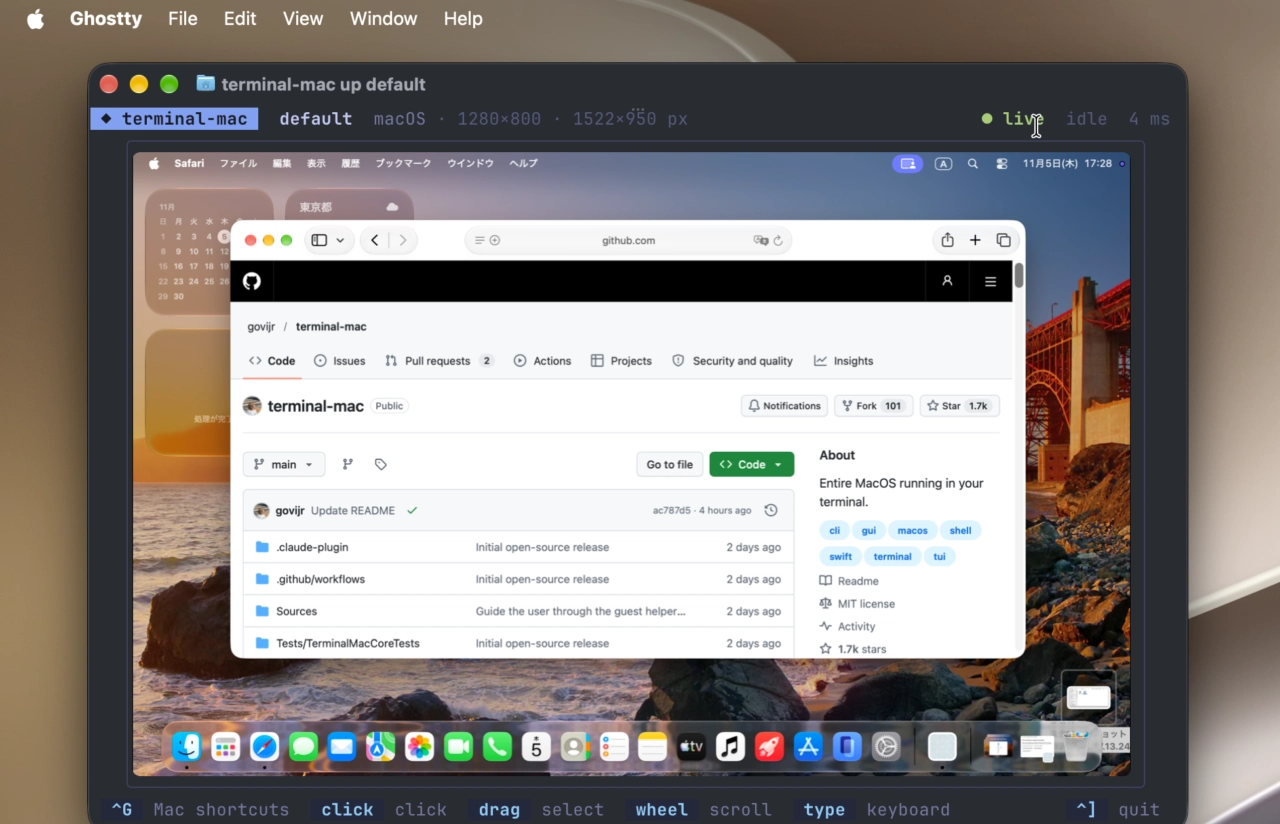
後はMCP ServerとSkillプラグインをインストールすれば、Claude CodeなどのAIがmacOS仮想マシンのスクリーンショットの取得、クリック、マウスポインターの移動、ドラッグ、スクロール、キーボード入力などの操作ができるようになるので、興味のある方は公式リポジトリをチェックしてみて下さい。
terminal-mac hit 1.2k stars on github in one day ✊
it comes with built-in MCP + skills so your agent gets its own Mac in one command:
claude mcp add terminal-mac — terminal-mac mcp
terminal-mac skills install https://t.co/4vS2IAZO49— govi (@kirtandopamine) November 4, 2026

コメント