OS X Yosemiteにアップグレードしてから「どこでもMy Mac」が表示されなくなった時の対処法です。
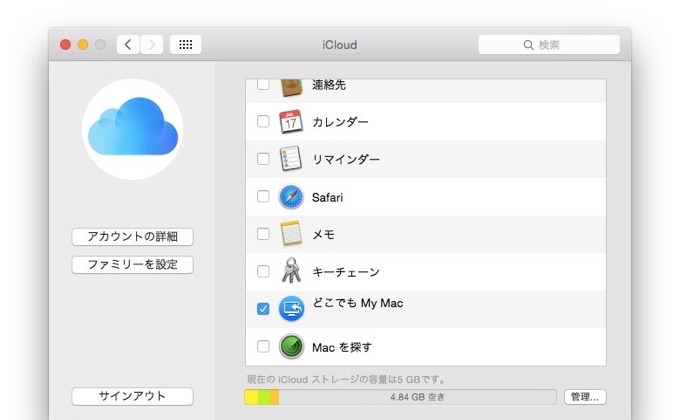
OS X YosemiteにアップグレードしたMacでFinderのサイドバーに「どこでもMyMacが表示されなくなった」とう不具合がApple Support Communitiesに多数投稿[1, 2, 3, 4, 5]されており、Appleも公式のサポートを出していたので試してみました。
Apple Support
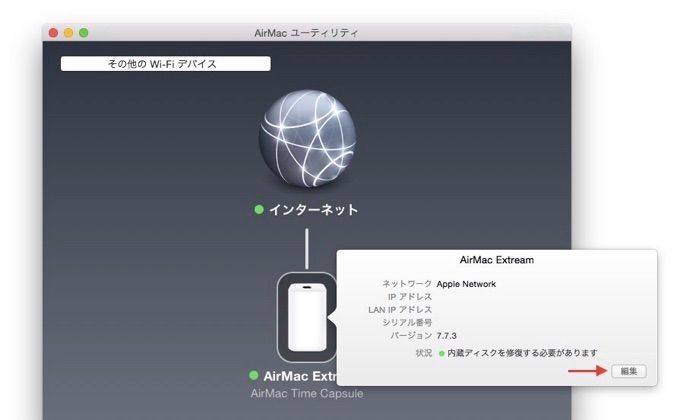
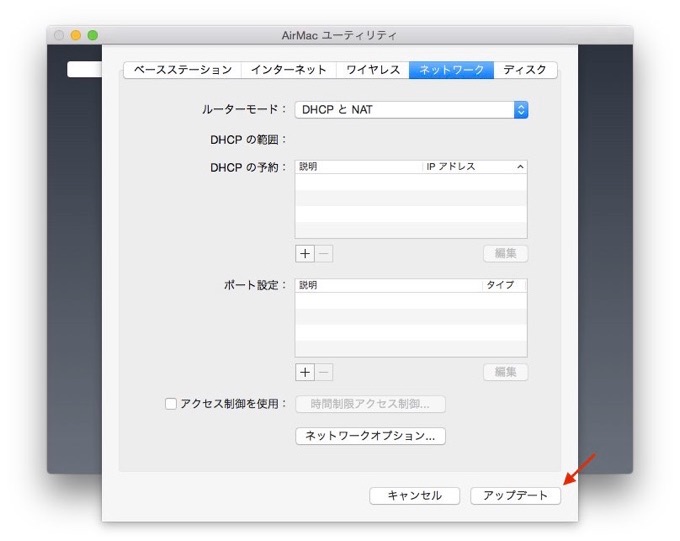
1.Apple製ルーター(AIrMac)を使用している場合は「AirMacユーティリティ.app」を開きルーターを選択して編集をクリック。
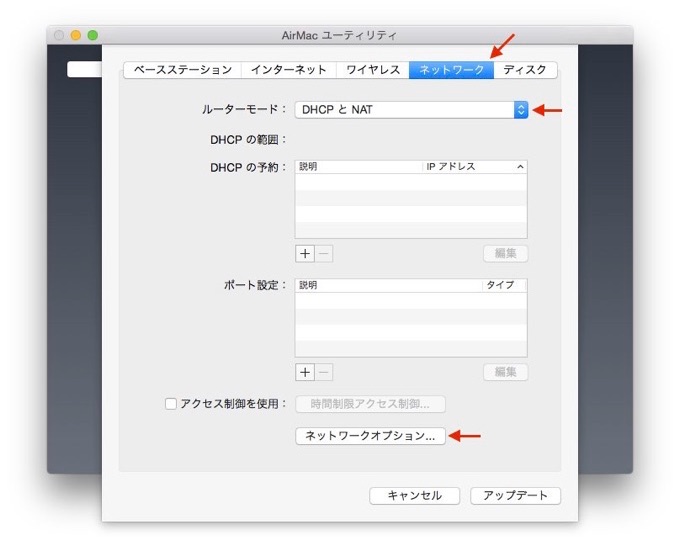
2.「ネットワーク」を選択し、ルーターモードのポップアップメニューで「DHCPとNAT」を選択(確認)。
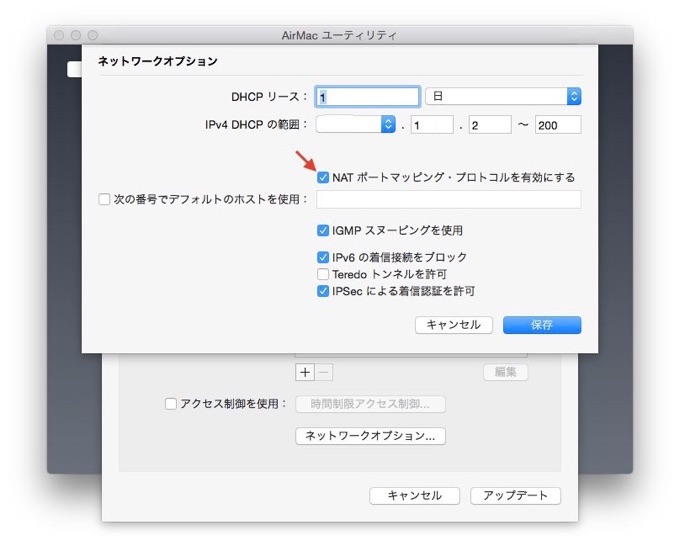
3.「ネットワークオプション」を選択し「NAT ポートマッピング・プロトコルを有効にする」にチェックを入れ「保存」。
4.「アップデート」を押してルーターの設定を保存します。
これはAirMac ExtremeやAirMac Time Capsuleの設定ですが、サードパーティ製ルーターを通して「どこでも MyMac」を使用していた場合、サポートページには「UPnPの設定をもう一度確認してください」と記載されています。
Back to My Mac can also use UPnP (Universal Plug and Play), which is similar to NAT-PMP, to configure some third-party routers. For information about enabling UPnP, see the router documentation or contact the manufacturer.
また、Apple Support Communitiesには以下の設定ファイルを消して再構築することで「どこでもMyMac」が復活したという方もいますがこの辺は自己責任でどうぞ。
- Repair permissions
- Deselect all options in /System Preferences/Sharing
- /System Preferences/iCloud Sign out and delete all local content
- Restart
- Delete /Library/Preferences/com.apple.BackToMyMac.plist
- Delete /Library/Preferences/com.apple.FindMyMac.plist
- Delete /Library/Preferences/com.apple.FindMyMac.plist.lockfile
- Delete files in: ~Library/Applications Support/Screen Sharing
- Restart
- Wait a few minutes after login to make sure the system has time to settle in. (I have allot of start-up items) Then go to /System Preferences/iCloud Sign back in
- Wait a few minutes
- run “dns-sd -B _afpovertcp._tcp” in command line again. The affected machine should now be listed as an iCloud member.
関連リンク:
- OS X Yosemite: If Back to My Mac doesn’t work – Apple Support
- 「どこでも My Mac」には AirMac ベースステーションまたは UPnP 対応の他社製ルーターが必要 – Apple

コメント